Learn how to make a DIY Pumpkin Topiary with paper mache and foam pumpkins, paint, and hot glue. This easy tutorial will add a festive touch to your fall decor!
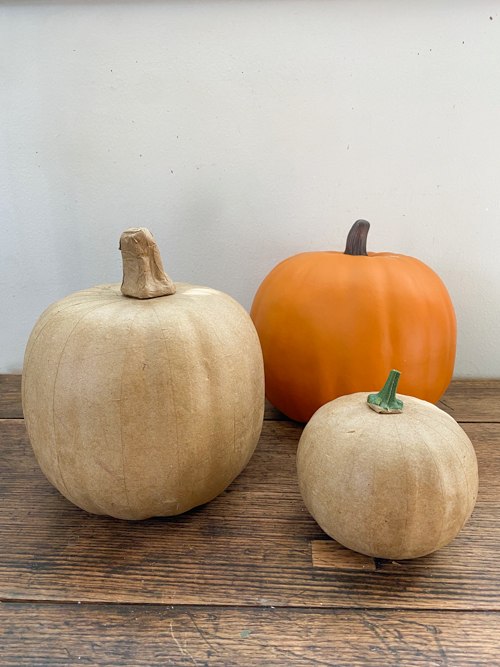
When a creative idea comes to me and I can use my yard sale finds to put it together, it makes it that much better. The three pumpkins used in this project cost me $1.50 at yard sales. (I share all of my yard sales and thrift hauls on my YouTube channel! You can find it HERE.)
The craziest thing that is they were all the perfect size to make a 3-tiered topiary. And, the foam pumpkin (which is the biggest) is heavier and perfect for the base. I am telling you, this happens more times than not and it is why I am always picking up things like this all year long. It is the best way to get decor exactly like you want without breaking the bank.
{Affiliate links are used in this post. Click on any of the underlined links to find the products I am talking about. You can read my disclosure HERE.}
Materials For This DIY Pumpkin Topiary
Paper Mache Pumpkins (I used two different sizes for the top two pieces of my topiary)
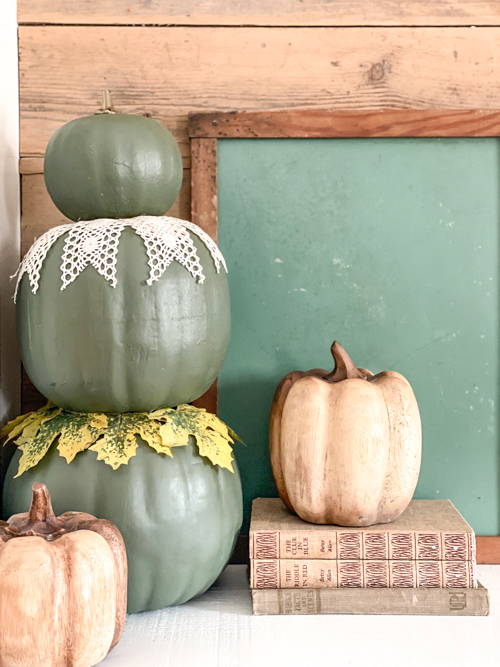
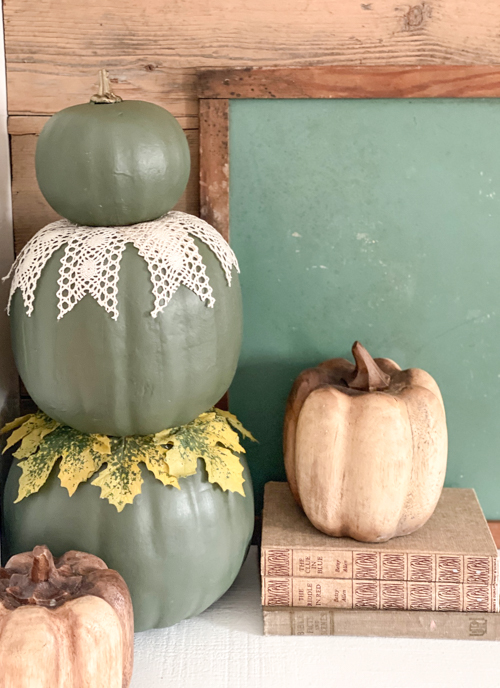
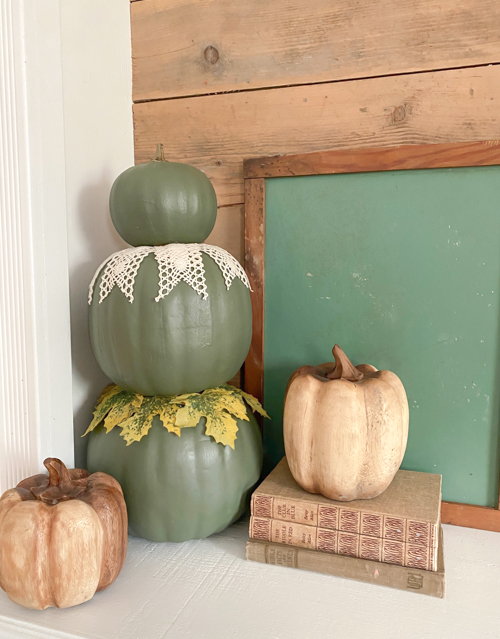
Foam Pumpkin (make sure all three of your pumpkins are different sizes so that it gives a tiered look and go smaller to bigger at the base. My foam pumpkin was heavier so it was perfect for the base.)
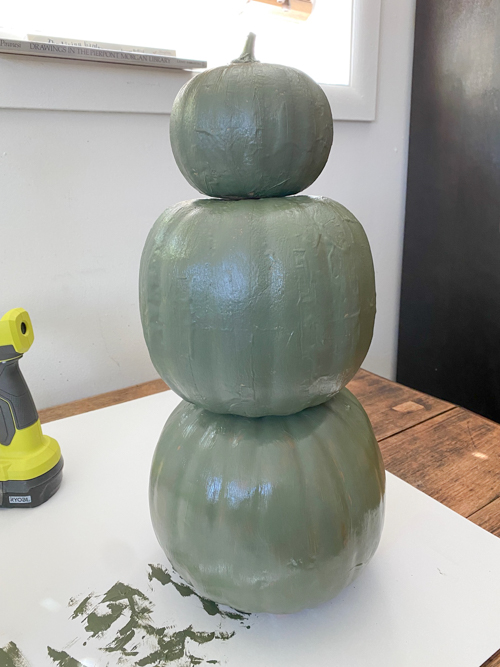
Paint (I used the color Bayberry)
Embellishments (Optional)
Steps For This DIY Pumpkin Topiary
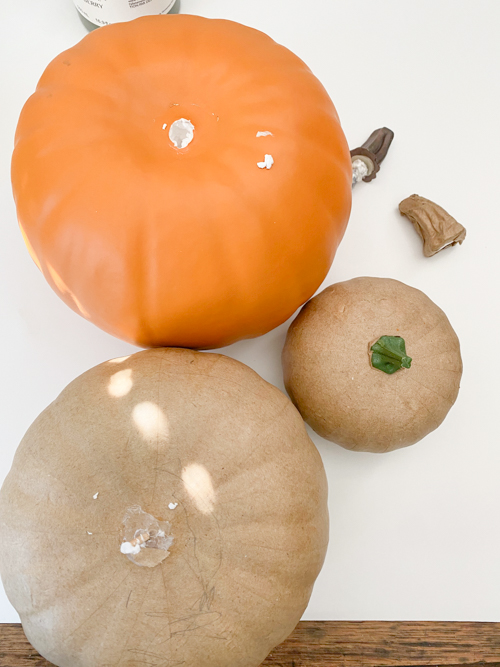
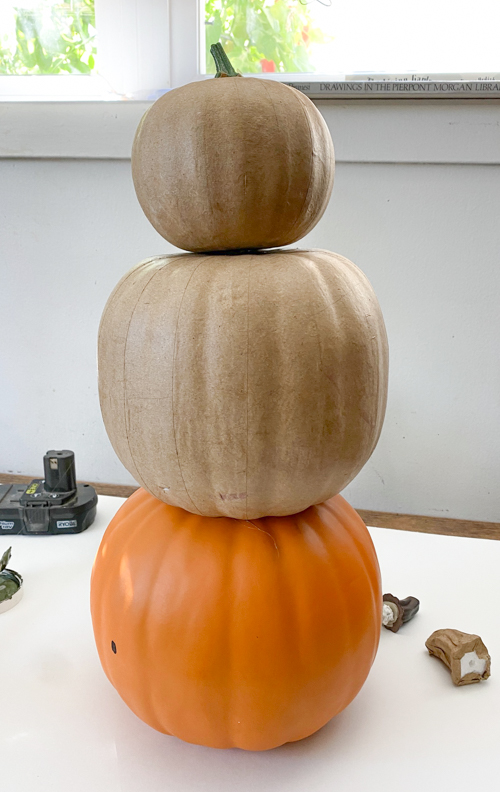
- Remove the stem from the bottom pumpkin.
- Apply hot glue to the top of that bottom pumpkin and place the middle pumpkin on top of the glue.
- Remove the stem from the middle pumpkin.
- Put hot glue on that middle pumpkin and the smallest pumpkin on that glue.
- Paint all the pumpkins.
I have been seeing some pumpkin topiaries that are off-centered and not so perfect which I like. So, if yours isn’t perfectly lined up, that’s great! It looks like what a real pumpkin stack would look like with the natural bumps and raises pumpkins have.
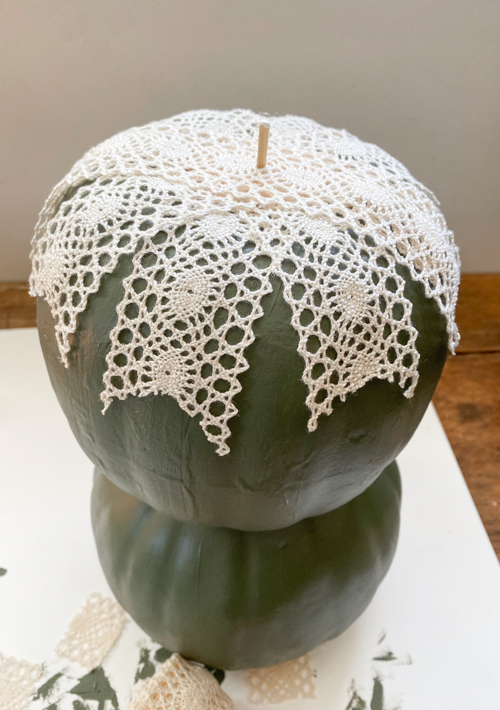
Once the paint dries, you can embellish it however you like. Or, leave it as it is.
I guess I was going with the grandma chic look with mine. HAHA.
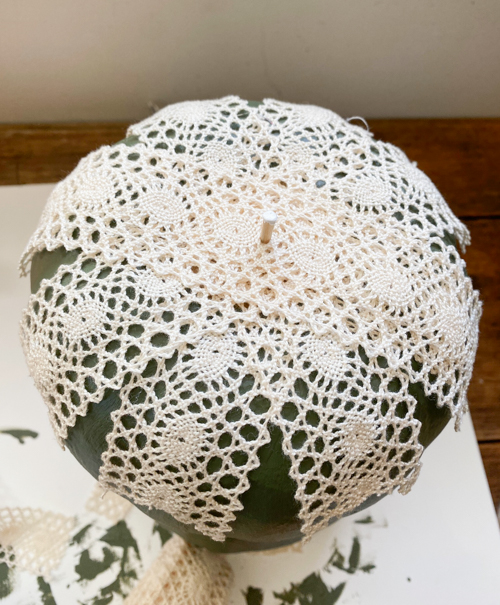
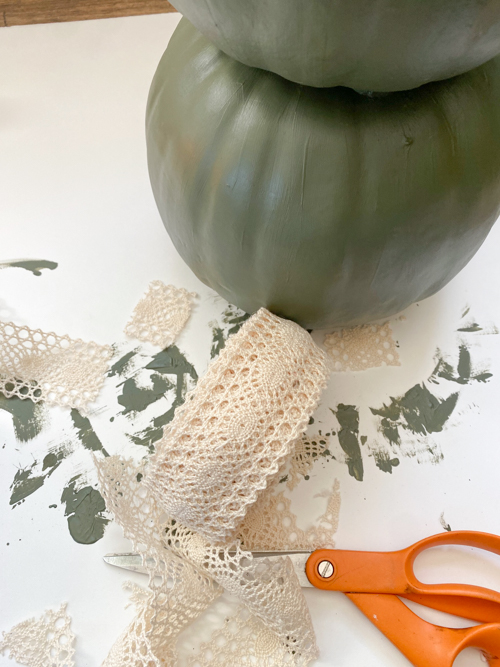
I have had this cotton lace ribbon (which I love) and I liked the way it looked with the green color. I laid it over the middle pumpkin and cut the ends.
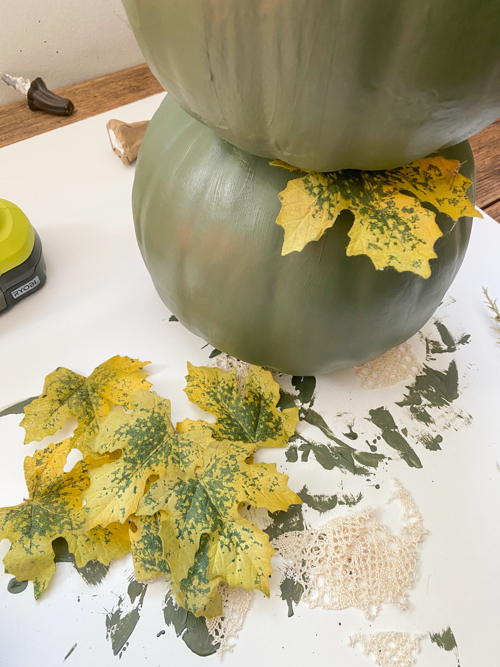
Then, I decided to hot glue faux leaves between the bottom two pumpkins.
I painted the top pumpkin stem in a brass color.
“Grandma Chic” for the win!
I only wanted to use supplies that I had on hand and to share how you can make over your thrifted and yard sale finds to get the look for a lot less.
The pumpkin topiaries I have found in stores aren’t cheap. This gives you the exact look for so much less.

To see how I did this project in real time, head to my YouTube video HERE.
Make sure you SUBSCRIBE when you are there. I am launching new videos every week!
PIN THIS POST!
