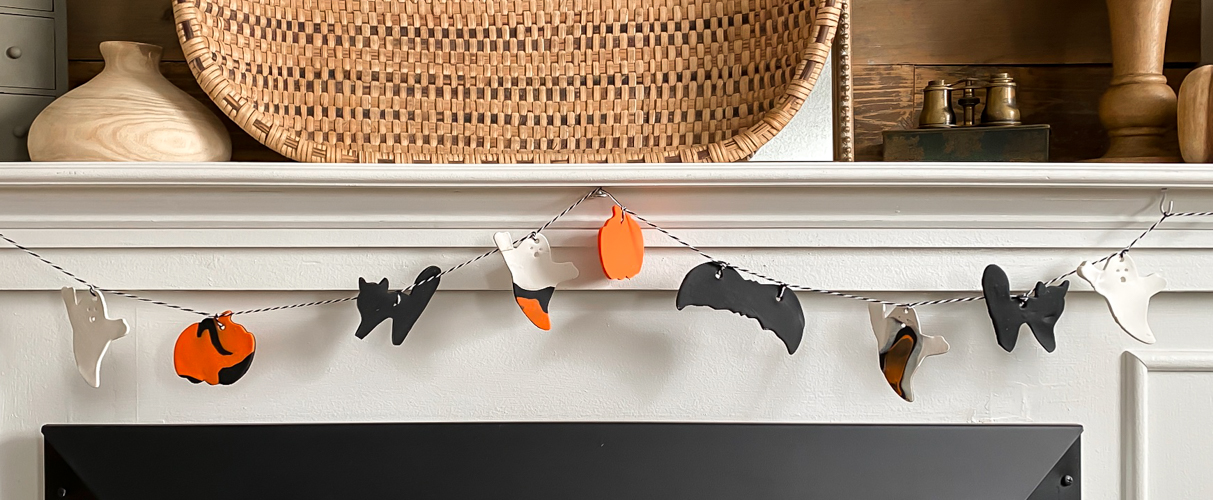
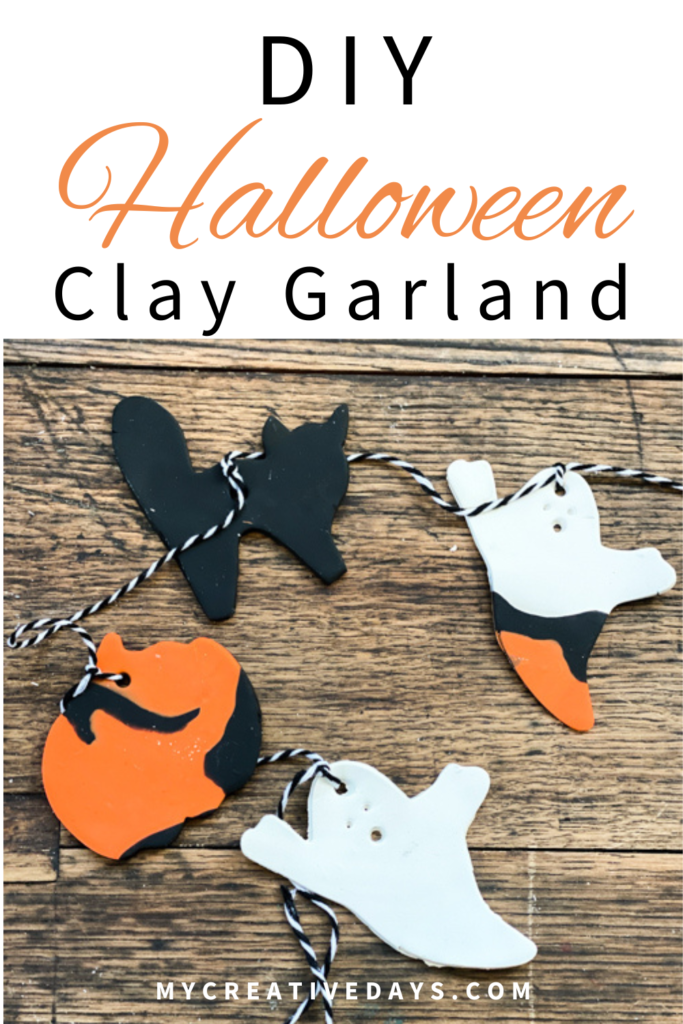
Halloween is just around the corner, and there’s no better way to get into the spooky spirit than by crafting your own DIY Halloween Clay Garland. This fun and easy project is perfect for adding a unique, handmade touch to your Halloween décor. In this step-by-step tutorial, you’ll learn how to create a beautiful garland using air-dry clay and a few simple materials.
{Affiliate links are used in this post. Click on any underlined links to find the products and sources I am referring to. You can read my disclosure HERE.}
Materials You’ll Need
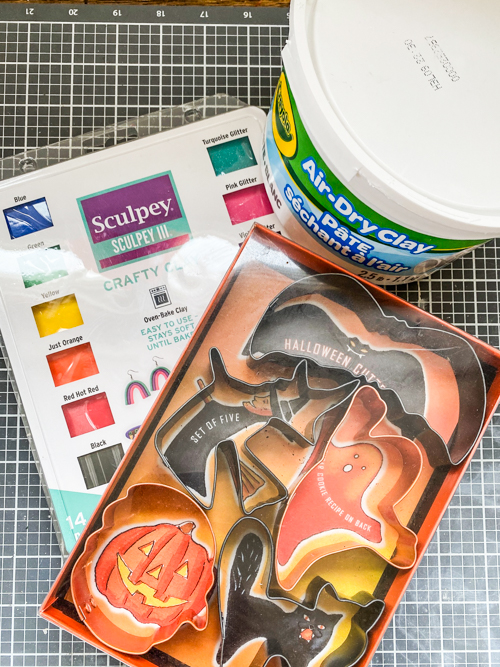
Before you begin making your DIY Halloween Clay Garland, gather the following materials:
- Air-dry clay
- Oven-Bake Clay
- Halloween-themed cookie cutters
- Rolling pin
- Twine or string
- Skewer or pen cap to make the holes
***NOTE: I used the air-dry and oven-bake clay because I had them on hand. You don’t have to get them both. The oven-dry has more colors but if you have the white air-dry, you could always paint the shapes after they dry.
Step-by-Step Instructions
1. Prepare Your Workspace
Start by setting up a clean, flat workspace. Cover the area with parchment paper or a craft mat to prevent the clay from sticking.
2. Roll Out the Clay
Take a portion of your clay and roll it out to about 1/4-inch thickness using a rolling pin. Ensuring an even thickness will help your DIY Halloween Clay Garland look professional and consistent. You don’t want to roll it out too thin because the shapes will break easily.
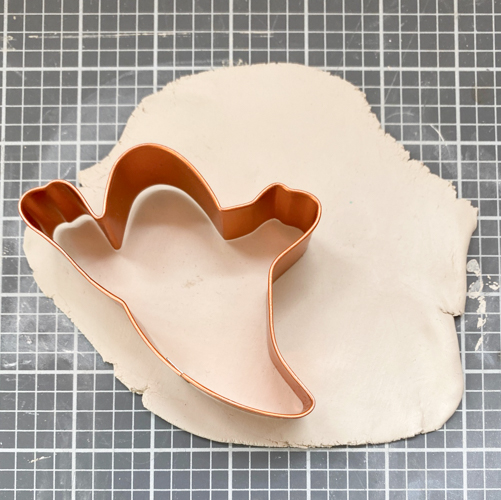
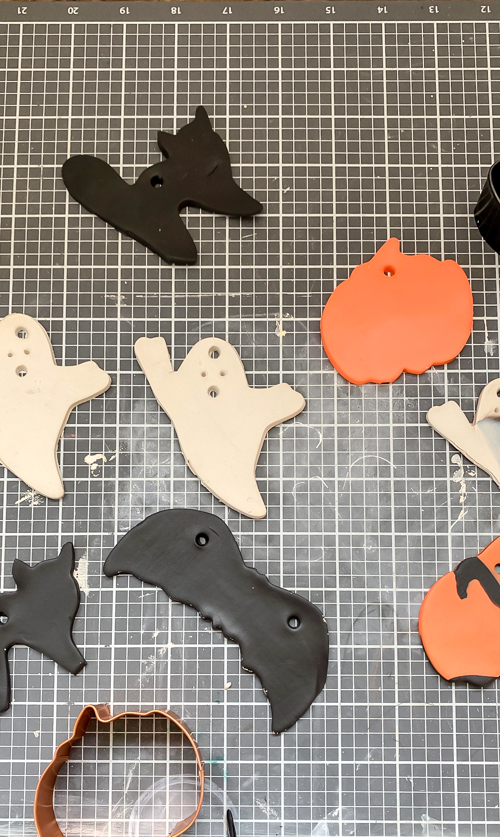
3. Cut Out Halloween Shapes
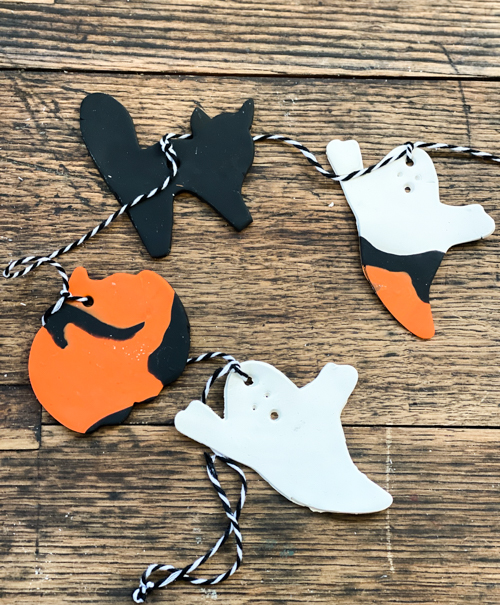
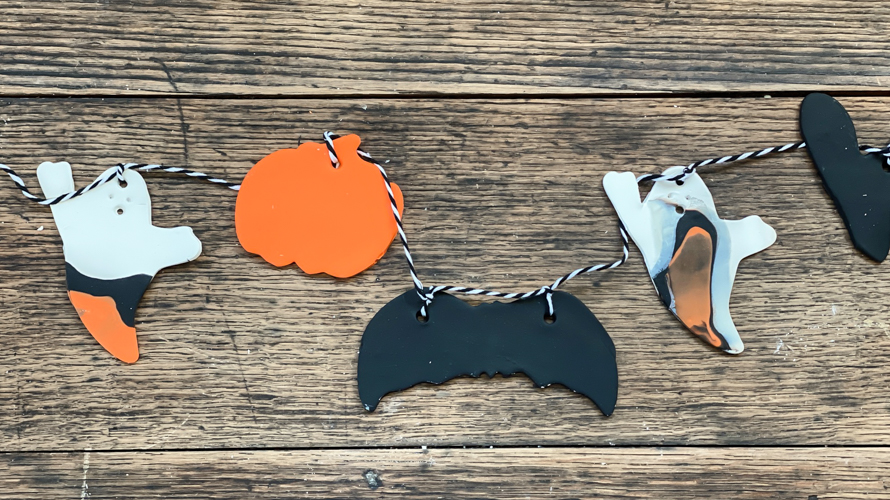
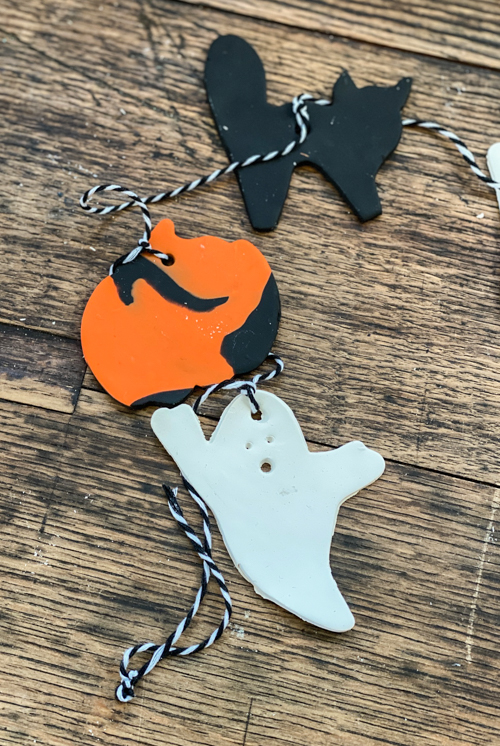
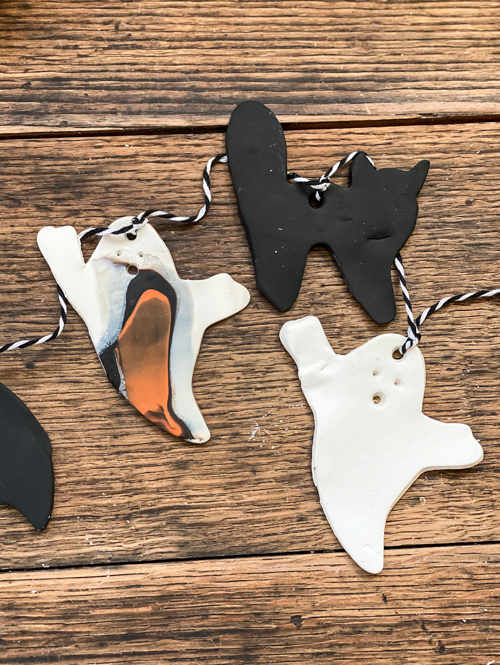
Using your Halloween-themed cookie cutters, press into the clay to cut out your spooky shapes. Ghosts, pumpkins, and bats are classic choices for your DIY Halloween Clay Garland, but feel free to get creative with other Halloween icons.
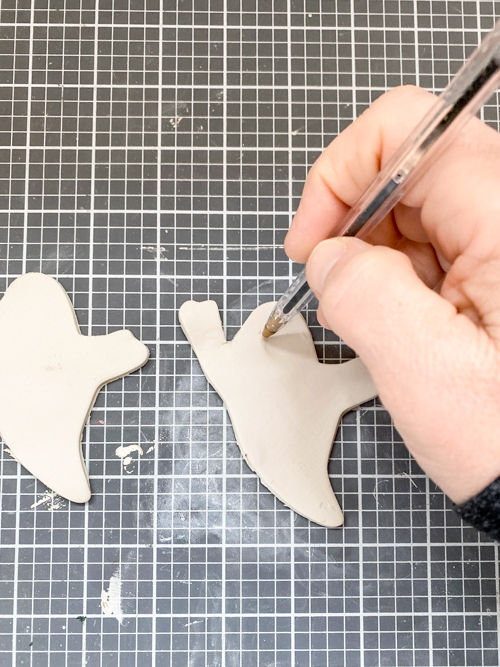
4. Create Holes for Hanging
After cutting out your shapes, use a skewer or pen cap to poke a small hole near the top of each one. This is where you’ll thread the twine through later to hang your DIY Halloween Clay Garland. I added some holes for the ghost’s faces as well.
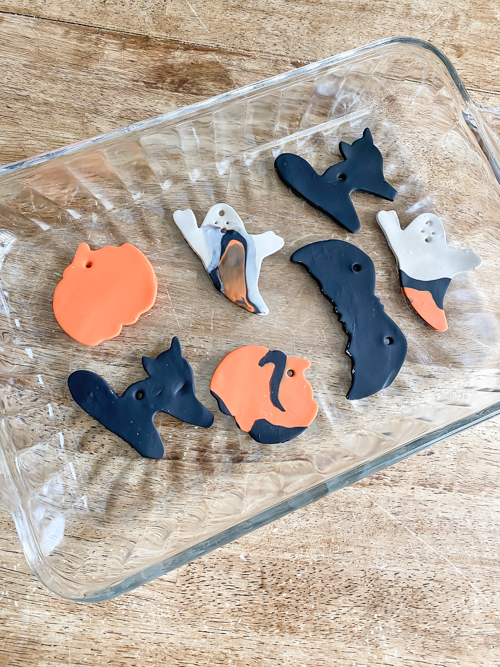
5. Let the Clay Dry
Allow your air-dry clay shapes to dry completely. Depending on the thickness of your shapes, air-dry clay can take anywhere from 24 to 48 hours to harden. Make sure they are fully dry before moving on to the next step to avoid any cracks or damage. I baked my oven-baked shapes at 275° for 15 minutes.
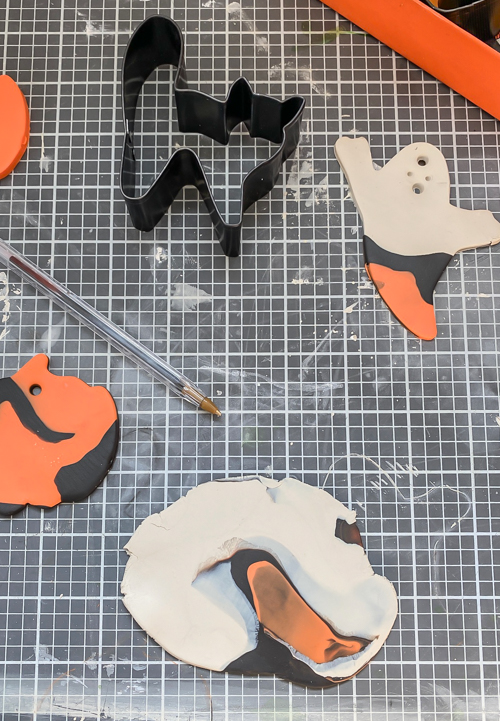
6. BONUS IDEA
I hate to throw supplies out. I had a little bit of the black, orange, and white clay left over. There wasn’t enough of each to cut out another shape with one color but when I put them together, I was able to get a couple more shapes cut out. I put them together in my hands first and then rolled them out with the rolling pin. It gave it a Halloween marble look. This look is so fun! I did mix the air-dry clay and the oven-bake clay and put them in the oven. It worked out fine.
7. Thread the Shapes onto the Twine
Now it’s time to assemble your garland. Cut a length of twine or string that’s suitable for the space where you plan to hang your DIY Halloween Clay Garland. Thread the twine through the holes in each shape, spacing them out evenly.
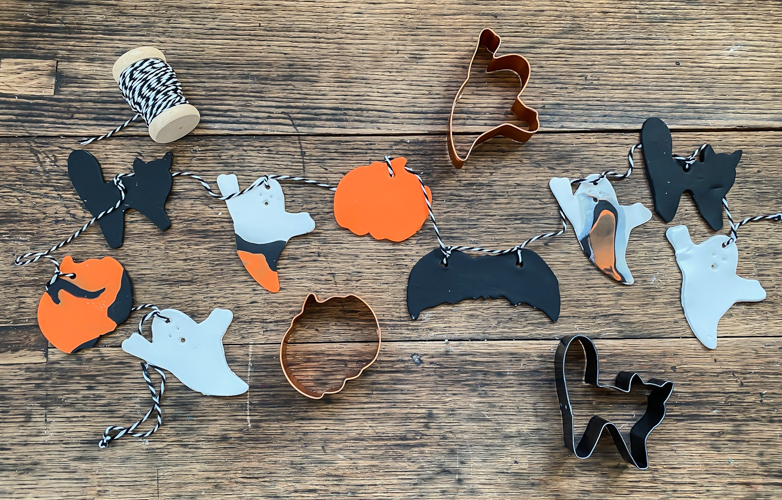
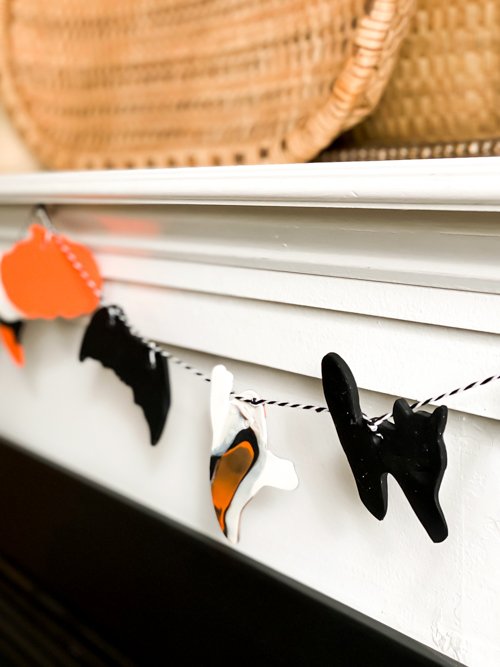
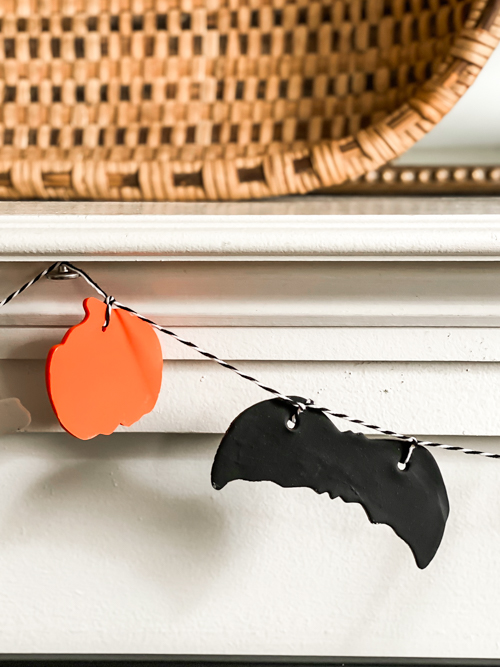
8. Hang Your Garland
Your DIY Halloween Clay Garland is ready to display! Hang it across your mantle, along a stair railing, or over a doorway to add a festive, spooky touch to your home.
Customization Tips for Your DIY Halloween Clay Garland
- Add Beads or Bells: For extra flair, consider adding beads or small bells between your clay shapes.
- Use Glitter: Add a touch of sparkle by sprinkling glitter onto the wet paint before it dries.
- Layered Look: Create multiple garlands and layer them for a fuller, more dramatic effect.
Why Make a DIY Halloween Clay Garland?
Crafting your own Halloween decorations not only allows you to customize your décor but also adds a personal, handmade touch to your home. A DIY Halloween Clay Garland is a simple project that yields impressive results, making it a great option for both beginners and experienced crafters. Plus, it’s a fun activity to do with family or friends as you get ready for the Halloween season.
You can watch me making this garland in real-time on my YouTube channel HERE. Make sure to SUBSCRIBE when you are there because I am launching new videos every week! I don’t want you to miss out on any of them!
PIN THIS POST!
If you liked this easy project, you will also love these:
DIY Pottery Barn Jack-O-Lantern Dupe
Aged Copper Jack-O-Lanterns DIY