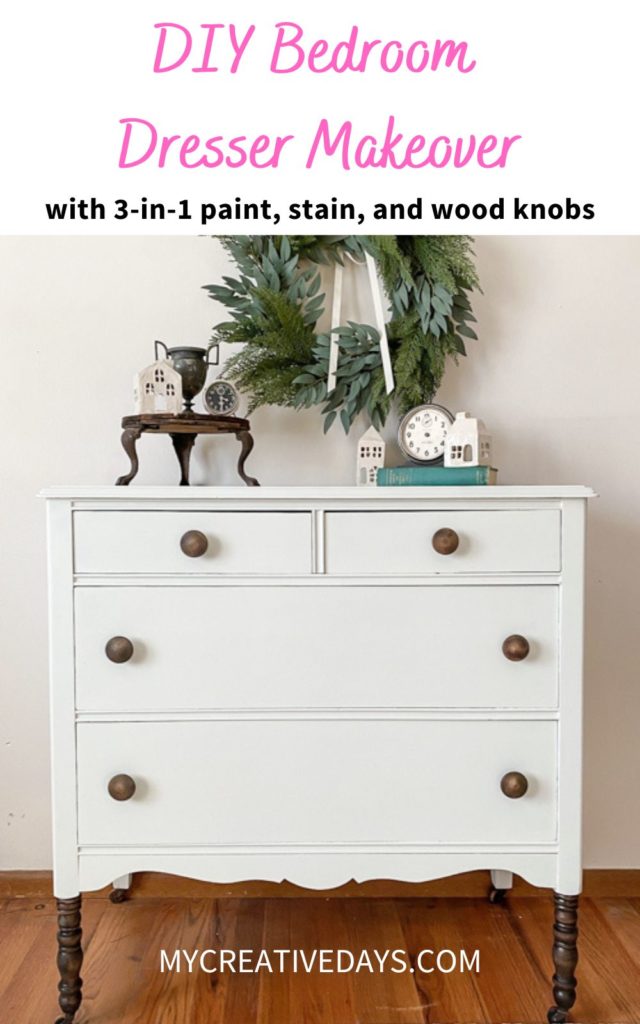
This DIY Bedroom Dresser Makeover is a great example of how all-in-one paint, a gel stain, and some new wood knobs can transform an old piece.
One of my favorite things about these makeovers is the story that goes along with them.
For this one, Matt and I were spending a Saturday morning going to some of our favorite spots to shop and see what we could find. We were inside our local Restore first and I came upon an amazing piece. It was a smaller piece (I love small pieces) and it was the perfect candidate for a makeover. It had some issues (but every piece I pick up usually does) and the price was right. Matt went to get a cart so we could put it in there and still look around. As we were loading the piece into the cart, we started noticing a lot more about the piece that was going to make it a bear to makeover. It was going to be a lot more work than it was worth so we had to leave the piece behind.
I was bummed. I knew it could be a really cute piece. But, one of my biggest tips is to always walk away from pieces you know won’t be worth it in the end. You will always find another piece.
That brings me to the next store we went to. I literally walked in the front doors and there was this dresser.
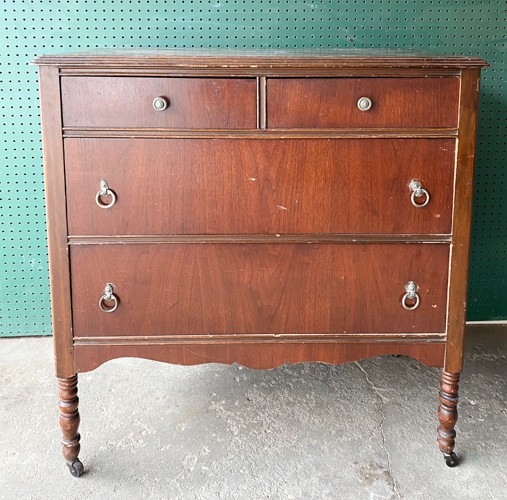
Matt and I laughed. We literally left Restore without that piece and the next store we walked into, this was there.
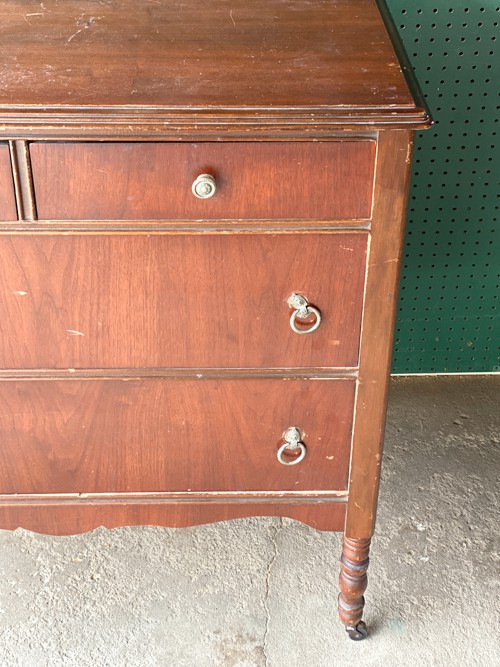
It had a few issues but nothing compared to the piece we walked away from. It had some great hardware but I knew I wouldn’t use it once I made it over.
BUT… I always keep hardware from pieces. I will use it on a piece eventually. It is always nice to be able to head to a stash of hardware when you are working on a piece and find something you can use. It saves you so much money and time on your makeovers.
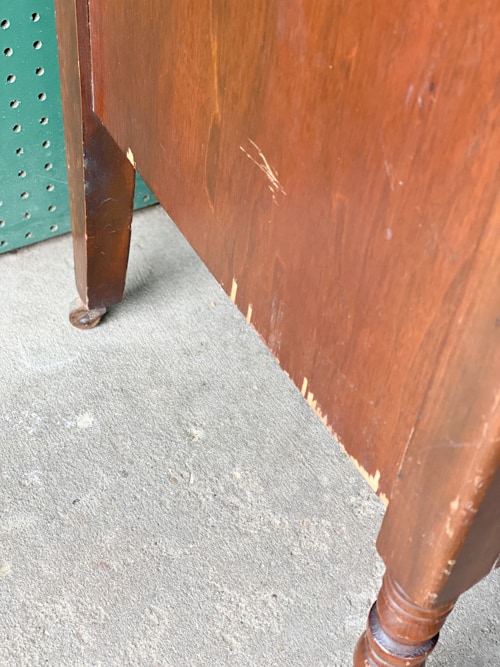
There was some missing veneer on the side which I was excited about. I know that sounds strange, but I wanted to try a new filler on some missing veneer so this piece was going to let me do that.
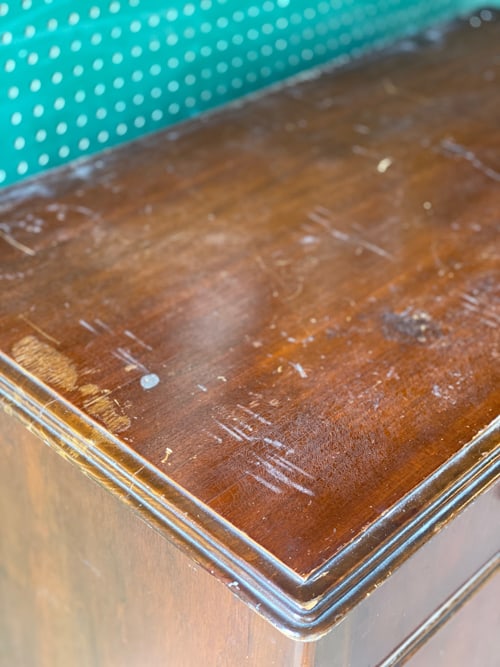
The top wasn’t in great condition but I knew a good sanding would fix that.
{Affiliate links are used in this post. Click on any of the underlined links to find the products I am talking about. You can read my disclosure HERE.}
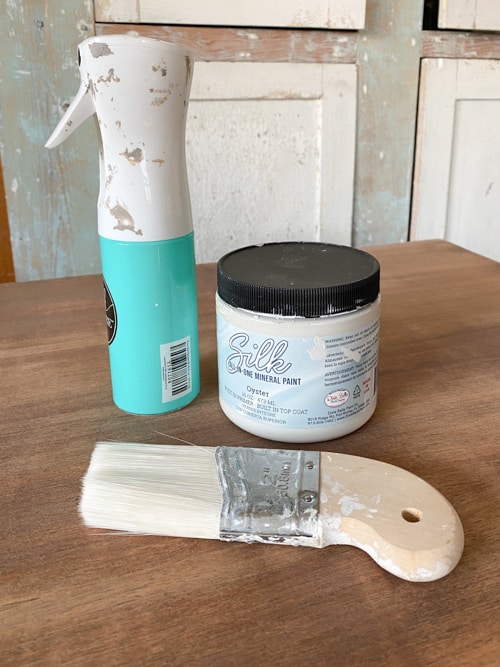
Supplies Used In This DIY Bedroom Dresser Makeover
All-In-One Paint (I used the color “Oyster”)
Gel Stain (I used the color “Walnut”)
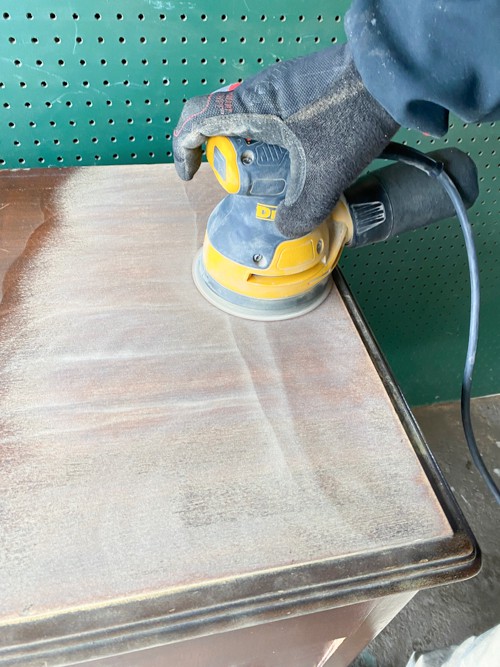
Steps To This Makeover
- I first cleaned this piece with water and vinegar.
- Then, I gave the piece a good scuff-sand with my favorite orbital sander and I sanded the front legs down more to the bare wood.
- Next, I wiped down the entire piece with a damp rag to get rid of any sanding dust left on it.
- Then, I applied the all-in-one paint. This stuff has been a game-changer for me. It has the primer, paint, and topcoat in one can! It saves me so much time on my projects.
- I put a first coat on everything but an area I needed to add some filler.
- As the first coat dried on everything else, I applied a new-to-me filler to an area on one side. I share my thoughts on this filler in the video linked below.
- Once the filler dried, I sanded it until it was smooth and flush.
- Then, I wiped away any sanding dust with a damp cloth.
- Once that was dry, I applied the first coat of the all-in-one paint to the filled area and the second coat to the rest of the dresser.
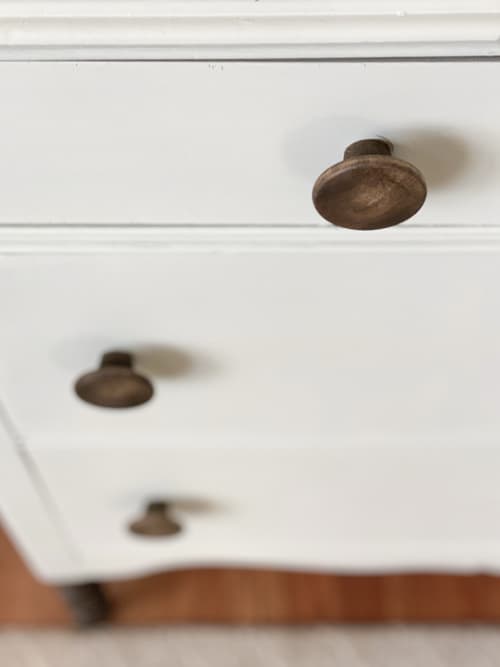
- As that coat dried, I stained the new wood knobs I was adding to the dresser. I shared how I do that in the video linked below.
- While the wood knobs were drying, I applied the gel stain to the two front legs.
- I added another layer of paint to the filled area and put the knobs on the drawers.
That’s it! The DIY Bedroom Dresser Makeover was complete!
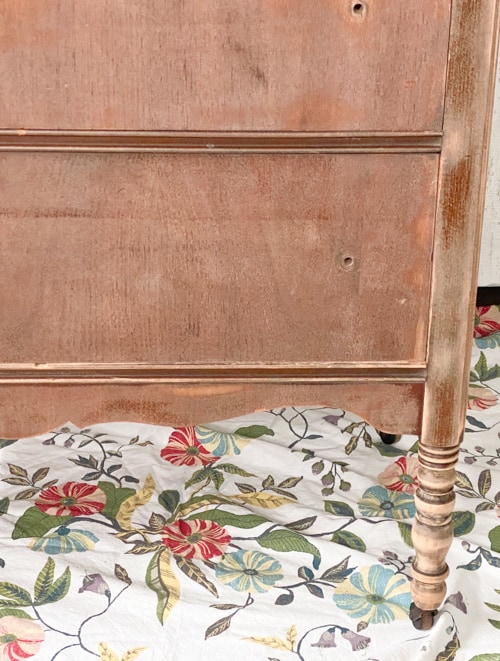
The Oyster color reads white to me with the slightest gray undertones.
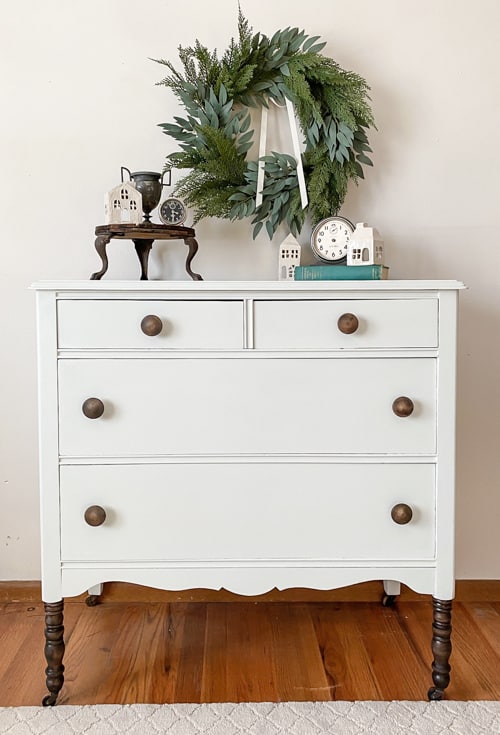
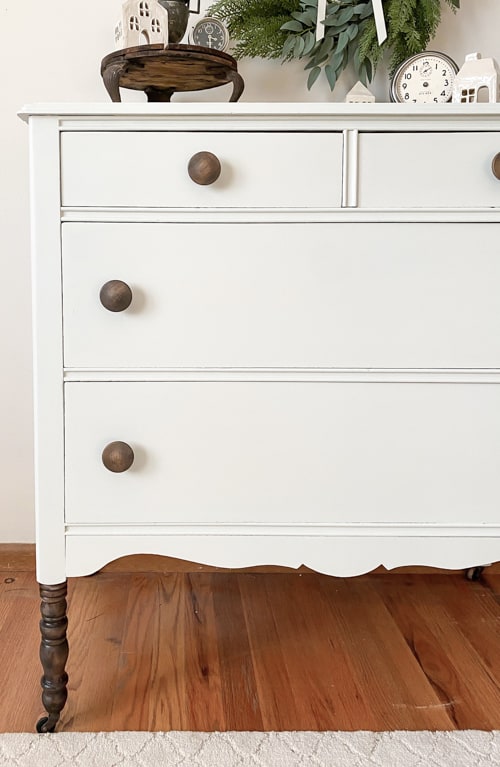
The legs are the real show-stoppers on this makeover.
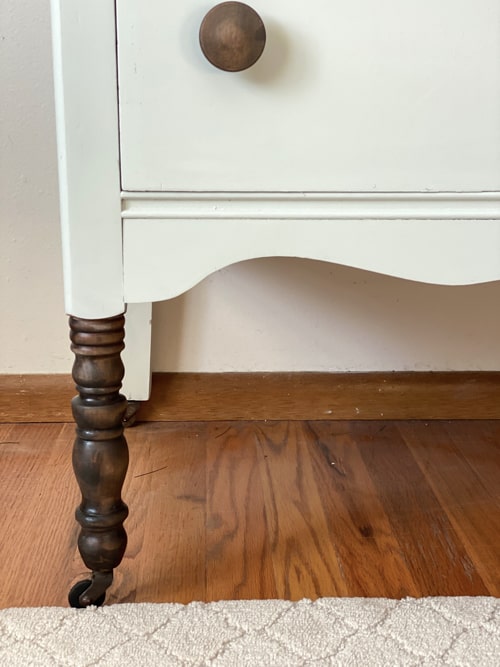
Any time that I can sand curvy legs like this down and stain them, I do it. I think it makes the piece a little extra special.
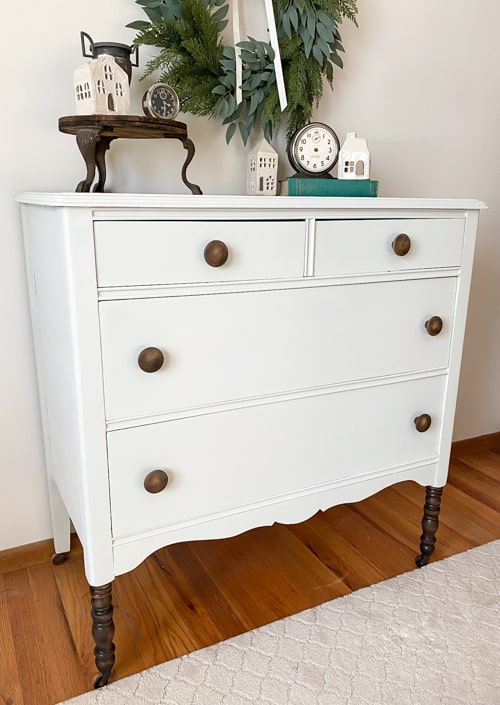
The wood knobs were the perfect addition to finish the DIY bedroom dresser makeover.
This dresser is a great size and offers a lot of storage. I am excited to see it go to its new home.
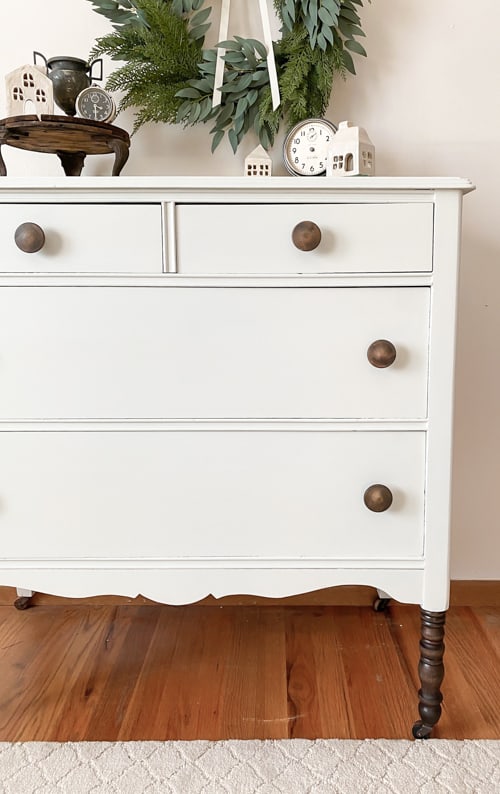
Would you have rescued this dresser?
You can find my full video of this makeover on my YouTube channel HERE.
Do You Want To Make Money Flipping Furniture?
After twenty years of doing this, I am still picking up pieces when I can find them because I love the creative outlet, but I am now coaching other furniture flippers on how to make more money in their business. If you are someone who is looking to start and/or grow a furniture flipping business, I would love to help you. There are ways to make money in your business beyond painting a piece of furniture. Once I learned that, my business flourished. Don’t waste your time trying to figure it out on your own.
To help other flippers, I created The Furniture Flipping Academy! The academy includes everything you need to start, grow, and/or scale a furniture flipping business. It includes courses, resources, templates, social media planner and guide, a private community, and so much more. It will ensure that you are doing the steps that will lead to success and not wasting your time on things that won’t.
You can find all the information about the Furniture Flipping Academy HERE.
Let’s get your business started and/or moving in the right direction. The Furniture Flipping Academy is for any flipper, from beginner to experienced. If your business is stagnant, there is a reason for that. Let me help you grow it into a flipping career that is profitable and fits the lifestyle you want to live.
PIN THIS POST!
