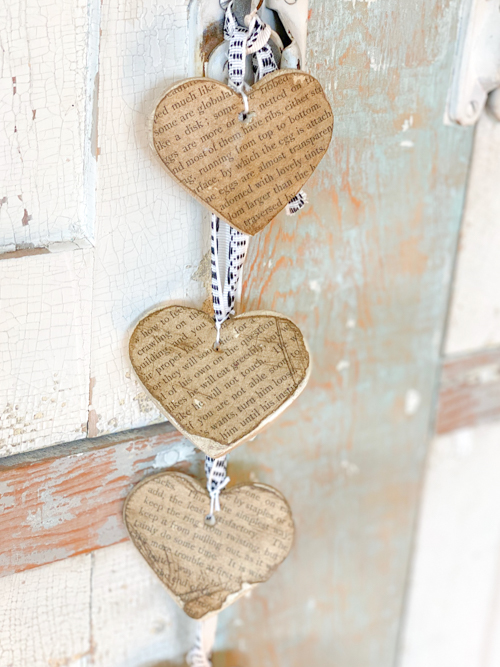
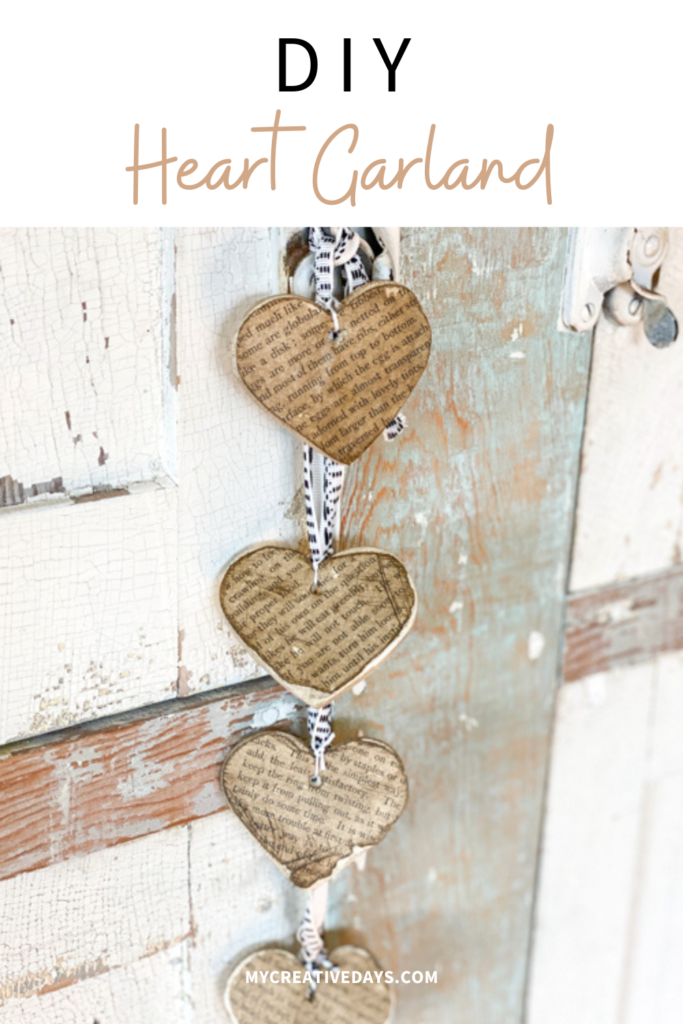
If you love crafting unique and budget-friendly decor, this DIY heart garland is the perfect project. Made with air dry clay, book pages, and stain, it creates a beautiful vintage-inspired accent for your home. Whether you’re decorating for Valentine’s Day, a wedding, or simply adding a touch of charm to your space, this garland is easy to make and customizable to fit your style.
{Affiliate links are used in this post. Click on any underlined links to find the products and sources I am referring to. You can read my disclosure HERE.}
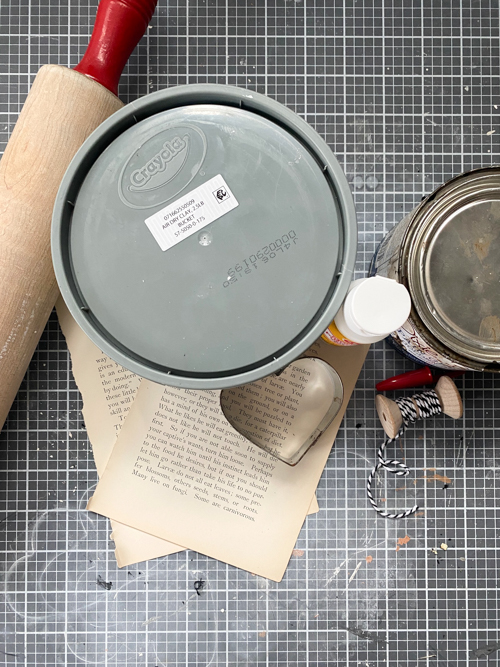
Materials Needed:
- Air dry clay
- Heart-shaped cookie cutter
- Rolling pin
- Book pages
- Mod Podge
- Foam brush
- Baker’s twine or jute string
- Pen cap or skewer (to create holes)
- Gel stain (in your preferred shade)
- Soft cloth or paper towel
- Scissors
- Pencil
- Ribbon
- Sandpaper
Instructions:
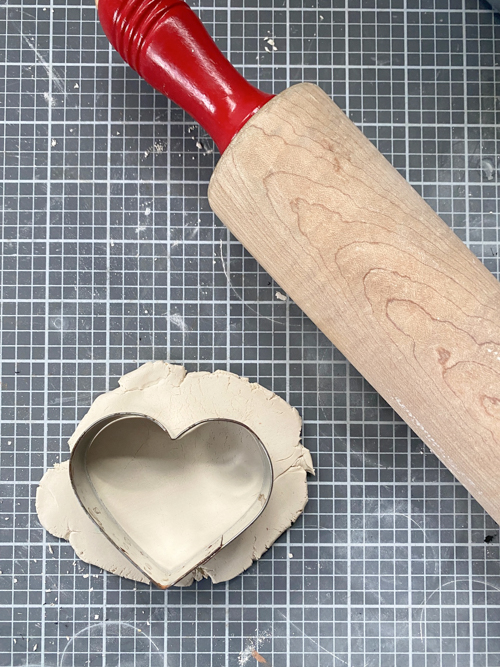
- Roll Out the Clay: On a clean surface, roll out the air dry clay to about 1/2-inch thickness.
- Cut Out Hearts: Use the heart-shaped cookie cutter to create multiple clay hearts.
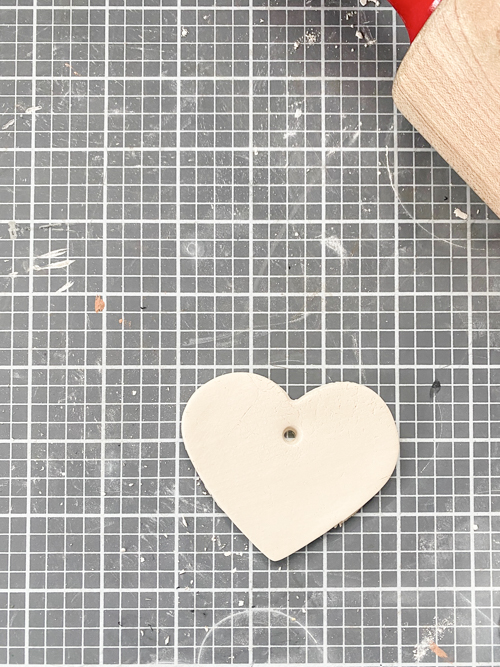
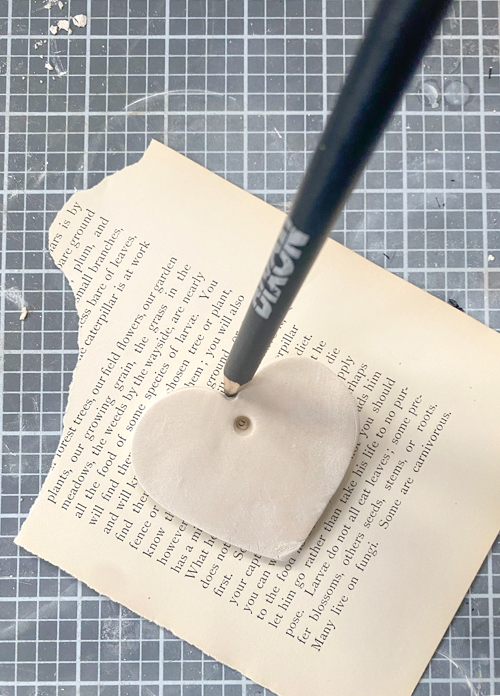
- Create Hanging Holes: Using a small drill bit or straw, make a hole at the top of each heart. This will allow you to string them together later.
- Let the Hearts Dry: Place the clay hearts on a parchment-lined surface and let them dry completely according to the air dry clay’s instructions (usually 24-48 hours).
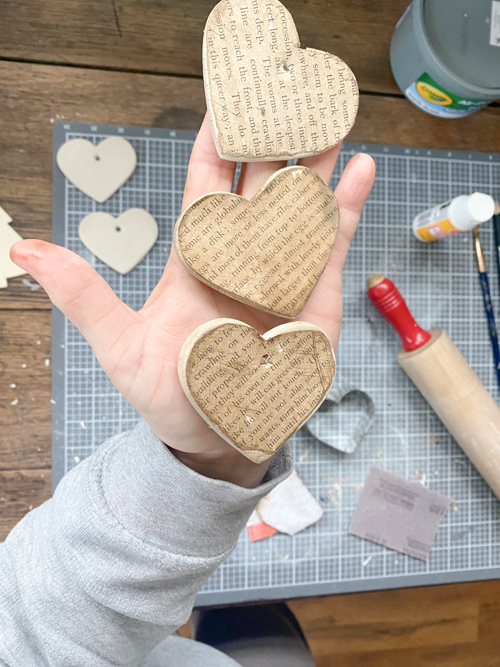
- Prepare the Book Pages: When hearts are dry, trace them on the book pages and cut them out.
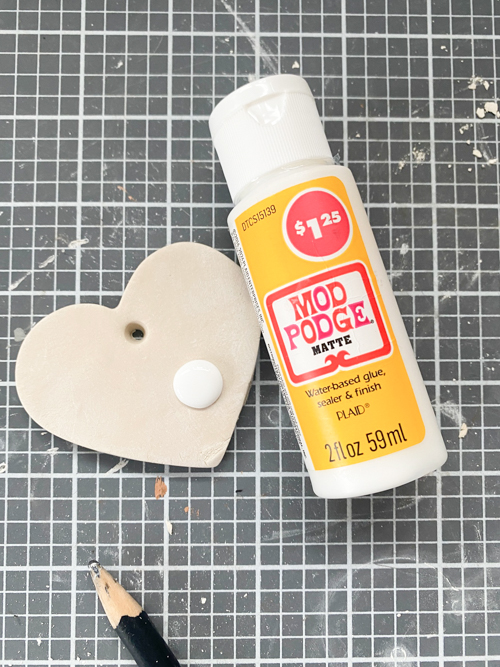
- Attach the Book Pages: Once the clay hearts are fully dry, use Mod Podge or craft glue to adhere the book page hearts to the clay. Let them dry completely.
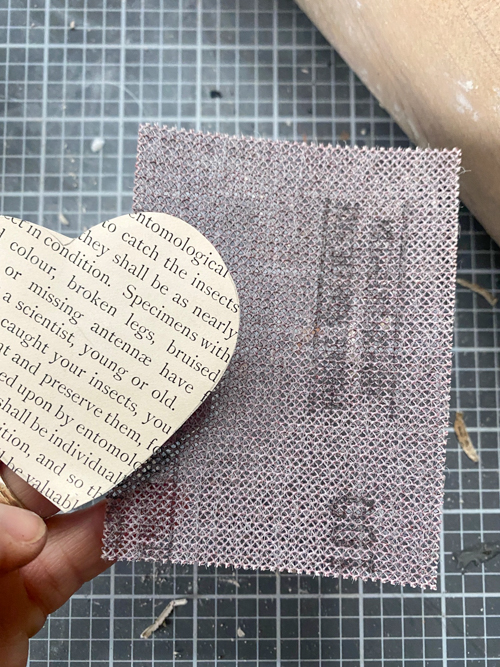
- Sand the Edges: Once the Mod Podge has dried, use sand paper to sand around the edges of the heart. It is okay if the book page tears, You don’t want it to look perfect.
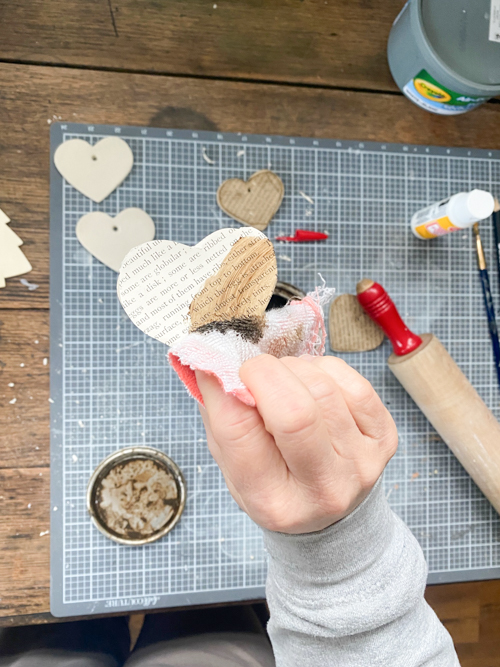
- Apply the Stain: Using a soft cloth or paper towel, lightly apply wood stain over the entire heart to give it a rustic, aged appearance. Wipe away excess stain and let it dry. Once dry, I added another layer of Mod Podge on top of the stain.
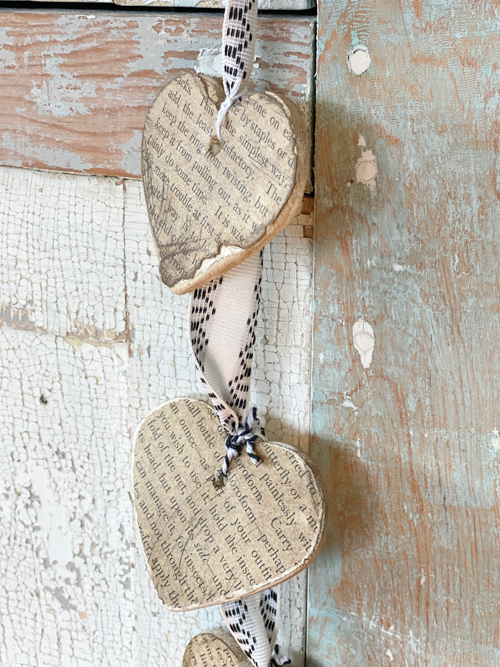
- Assemble the Garland: Thread twine or jute string through the holes of each heart, spacing them evenly. Tie knots if needed to keep them in place. I just tied baker’s twin to mine and then tied that baker’s twine to a ribbon.
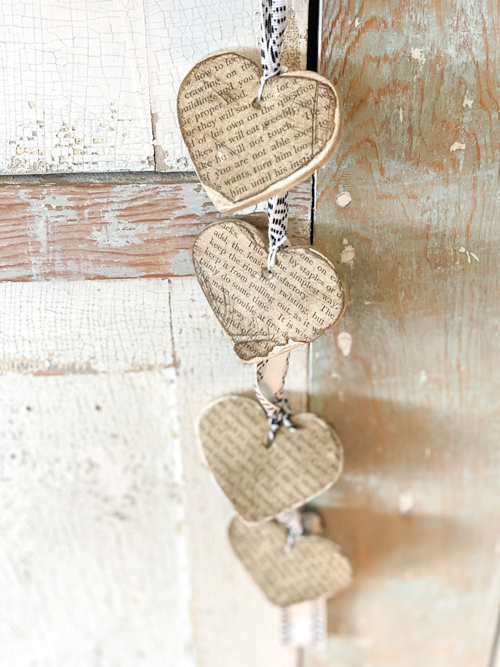
- Hang and Enjoy: Display your DIY heart garland on a mantel, shelf, or wall to add a cozy, handmade touch to your decor.
Customization Ideas:
- Use different book page colors or add a light whitewash effect for a softer look.
- Experiment with different stain shades to match your decor.
- Add embellishments like beads or lace for extra texture.

This DIY heart garland is a simple yet stunning way to incorporate handmade charm into your home. Whether you’re making it for a special occasion or just for fun, this project is sure to bring warmth and personality to any space. Try it out and let your creativity shine!
To see this come together in a video tutorial, head HERE to my YouTube channel. Make sure to SUBSCRIBE when you are there. I am launching new videos every week!
https://youtube.com/shorts/tBmOM0q1feM
PIN THIS POST!
If you liked this DIY Heart Garland, you will also love these projects:
DIY Wood Bead Valentine Wreaths
DIY Driftwood Decor: Heart Wreath